

House Painting Process | Step-by-Step Guide
House Painting Process | Step-by-Step Guide. Painting your house is more than just painting the walls; it's about making it seem cozy and shielding it from deterioration. A new coat of paint may give a drab room life and raise the first impression and overall value of your house. Painting your home extends the life of your walls and trim by sealing and protecting surfaces from moisture, mildew, and other environmental conditions. This benefit goes beyond aesthetics. The correct color scheme can also draw attention to natural light and create a feeling of space that is more comfortable or larger. Paint your property a new color to give it a fresh new look and a completely personalized touch for a reasonable price provided you prepare it well and use high-quality paint.
House Painting Process | Step-by-Step Guide
Introduction
Painting your house is more than just painting the walls; it's about making it seem cozy and shielding it from deterioration. A new coat of paint may give a drab room life and raise the first impression and overall value of your house. Painting your home extends the life of your walls and trim by sealing and protecting surfaces from moisture, mildew, and other environmental conditions. This benefit goes beyond aesthetics. The correct color scheme can also draw attention to natural light and create a feeling of space that is more comfortable or larger. Paint your property a new color to give it a fresh new look and a completely personalized touch for a reasonable price provided you prepare it well and use high-quality paint.
Paint is an important component in improving your home's longevity and attractiveness. Your living spaces will benefit from its unique individuality and charm as well as protection from weather, moisture, and general wear and tear. It is possible to build a barrier against moisture, mold, and mildew while at the same time creating a warm and inviting environment with the appropriate color and treatment choices. Paint is an important maintenance and cosmetic investment since it keeps your home appearing new and vibrant for many years to come.

Benefits of Painting Your House
Making a solid first impression is more important than just painting your property to make it seem attractive. Your house can have a noticeable difference in the area and immediately increase its curb appeal with a new coat of paint. A well-painted exterior can give the impression that your home is well-maintained and welcoming, regardless of whether you choose a classic or bright color. It can also raise the value of your house if you want to sell it in the future. You may draw attention and make your property the talk of the neighborhood with the right paint job.
Paint is more than simply a color change for your home; it's an investment that may provide significant returns. A freshly painted house might fetch a lot more money. Homes with a tidy, well-kept exterior and interior tend to attract more potential buyers. You may increase your home's marketability and curb appeal by painting it with a new coat of paint. You will also get significantly higher returns if you use premium paint and qualified application. Painting your property is therefore a wise decision, regardless of whether you want to sell soon or simply wish to raise its value.
Painting your home is an investment that will protect it from the weather in addition to making it show good. Rain, wind, sun, and snow can all be warded off from your house with a well-applied coat of paint. It forms a shield that keeps moisture from affecting your walls and resulting in damage or mold growth. In addition, many paint varieties have the ability to reflect UV light, which will assist keep your house cooler in the summer. So, investing in a professional paint job not only adds attractiveness on the street but also provides a strong protection against everything Mother Nature throws at it.
Choosing the Right Paint
You can choose from a variety of paint types, each with advantages and disadvantages, when painting your home. Water-based paint, or latex paint, dries fast, has little smell, and is simple to clean up with water. It is environmentally safe and excellent for the majority of indoor uses. Oil-based paint, on the other hand, takes longer to dry and requires mineral spirits to clean up, but it is more durable and has a smoother finish, making it suitable for high-traffic areas such as trim and doors. Specialty paints include acrylic paint, which provides a long-lasting, durable finish, and primer, which improves paint attachment to surfaces. So, examine your project's needs and select the sort of paint.

It is important to take both indoor and outdoor areas into account when choosing paint for your home. Important factors to consider for interior paint involve color selection, longevity, and ease of cleaning. Select a paint finish that is appropriate for the room's use: semi-gloss for longevity in high-traffic areas, satin or eggshell for simple cleaning in kitchens and bathrooms, and matte for a comfortable feel in bedrooms. Weather resistance and durability are important factors in outdoor paint. Select paints that are designed to endure extreme weather conditions such as rain, UV radiation, and temperature changes, and are labeled expressly for outdoor use. For both indoor and outdoor projects, proper surface preparation is essential to ensuring paint application and extended paint life. You can select the right paint by taking these things into consideration.
Gathering Supplies
Proper tool selection is essential for success when painting. Paintbrushes come in a variety of sizes and forms to suit different surfaces and details such as trim and corners. Large areas may be covered quickly and uniformly with rollers, while furniture and floors can be shielded from spills and drips with drop cloths. When painting or trimming areas where walls meet ceilings and trim, painter's tape helps create clear, clean lines. To maintain the quality of your instruments, don't forget about essentials like paint trays, stirring sticks, and cleaning agents. Purchasing high-quality equipment will help your painting project go more smoothly and guarantee results that appear professional.
Before beginning your painting action, it is critical to thoroughly clean your surfaces, and having the right cleaning supplies may help. To begin, use a light soap and water solution to clean the walls, getting rid of any oil, grime, and any leftover paint shedding. After lightly cleaning with a sponge or cloth, give the area a thorough rinse with clean water. A bleach and water mixture will work wonders for mildew or more stubborn stains, but make sure you wear safety glasses and open the space to air out. After cleaning, let the surfaces thoroughly dry before priming or painting. Remember to collect additional necessary supplies for preparation, like as filler to seal holes and cracks and sandpaper to smooth out unequal areas.
Preparing the Surface
To guarantee an even and durable paint job, cleaning the walls is an essential step before painting. First, use a dry cloth or duster to remove any dust, filth, or cobwebs. After that, use a sponge or soft brush to gently scrub the walls using a light detergent solution mixed with warm water. Pay extra care cleaning areas with stains, grease, or fingerprints, and then thoroughly rinse with clean water to eliminate any soap behind. Before painting or priming the walls, let them dry fully. In addition to providing a cleaner, more polished finish, proper washing also improves paint attachment.
Fill in any holes, cracks, or other damage to your walls before painting. First, smooth the area with sanding after clearing away any loose material. Next, smooth up the damaged areas with a putty knife after filling them in with wall mud or spackling compound. To strengthen the repair, you might need to use mesh tape or a drywall fix for larger holes. After the repair dries, sand it until the surface is flat with it. To guarantee a perfect result, remove any remaining dust and prime the areas that have been fixed before applying paint. A longer-lasting paint job with an improved look can be achieved by taking the time to repair damaged areas.
Because it helps create a smooth and equal surface, sanding is an essential step in getting your walls ready for painting. The walls' rough patches, lumps, and defects should first be carefully sanded using medium-grit sandpaper. Make sure you sand in a circular manner to avoid leaving noticeable pollution. To guarantee a flawless finish, make one last pass with fine-grit sandpaper when the surface feels smooth to the touch. Before priming or painting, make sure the walls are totally dry after sanding by wiping them down with a damp cloth to remove any dust. A long-lasting, polished finish is achieved by sanding to guarantee that your paint applies evenly and sticks well.
Protecting Furniture and Floors
Using drop cloths and plastic coverings is essential to protect your floors, furniture, and other belongings from paint splatters and spills during the painting process. Lay down drop cloths or plastic sheets to cover the entire area you'll be working in, securing them with painter's tape if needed. This will prevent paint from getting onto surfaces that you don't want to be painted, making cleanup much easier. Additionally, consider covering larger furniture pieces with plastic or moving them out of the room altogether to keep them safe from accidental drips. By taking these precautions, you can ensure a mess-free painting experience and preserve the condition of your belongings.

Furniture should be moved out of the way or covered while painting your house to avoid spills and paint drops. If at all possible, start by clearing the space of the smaller objects. Paint drip protection can be achieved by covering bigger furniture pieces that are immobile with drop cloths or plastic sheets. In order to make sure the coverings stay in place during painting, secure them with painter's tape. You may paint your walls a new color and freshen up your space while keeping your furnishings clean and safe by following these tips.
A smooth and successful painting project depends on the work space being secured. Make sure there is enough room to move around comfortably and remove any barriers before proceeding. Paint drops and spills can be avoided by covering floors with plastic sheets or drop cloths. To keep coverings in place while avoiding accidental paint marks on trim and edges, use painter's tape. To reduce the amount of dust and waste that moves throughout the house, think about dividing the work area from other areas using plastic barriers if needed. By using these safety measures, you may make your painting attempts safe and well-organized.
Applying Primer
A good painting project requires primer, even though it may seem like an extra step. Primer improves paint bonding to surfaces, resulting in a glossy, long-lasting finish. In order to minimize uneven paint absorption and guarantee uniform color and sheen, it also seals porous surfaces like drywall or bare wood. In addition, primer can cover over dark colors and stains, lowering the number of coats required for complete coverage and ultimately saving you time and money. You may get long-lasting, professional-looking effects by applying primer.
A good painting job depends on selecting the appropriate primer, since different surfaces require different kinds of primers to work well. A good latex primer, for example, seals the surface and creates a smooth surface on which paint may hold on making it perfect for painting over bare wood or drywall. Select a stain-blocking primer to stop stains and smells from seeping through the paint on surfaces affected by smoke, water damage, or other sources. To improve adherence, it is advised to use a bonding primer when painting over glossy or slick surfaces like tile or laminate.
Choosing the Right Paint Color
There are a few crucial things to take into account when choosing colors for your painting project. First, consider the mood and environment you want to create within the room. While darker colors bring coziness and warmth, lighter colors can give the impression that a room is larger and more open. Take into account the room's purpose as well. Vibrant yellows or oranges can enliven a kitchen or living space, while peaceful blue or greens may be perfect for bedrooms. To make sure the colors work well together, it's also critical to consider the furniture, flooring, and other current parts of the space. Ultimately, keep in mind that natural light can change the look of colors, so it's a good idea to try paint samples in the space before making any final decisions.

It is important to examine sample paint colors before deciding on a final paint color to make sure you are satisfied. Color the look of your environment can be affected by various elements, including surrounding design and lighting. Start by painting small samples of your chosen colors on different walls and observing them throughout the day to see how they look in various lighting conditions. Additionally, think about how the colors go with the current decor and furniture. Take your time evaluating the samples and do not rush to a decision. You may make an informed decision and be certain that the painting project will turn out to your satisfaction by testing sample paints.
Painting Techniques
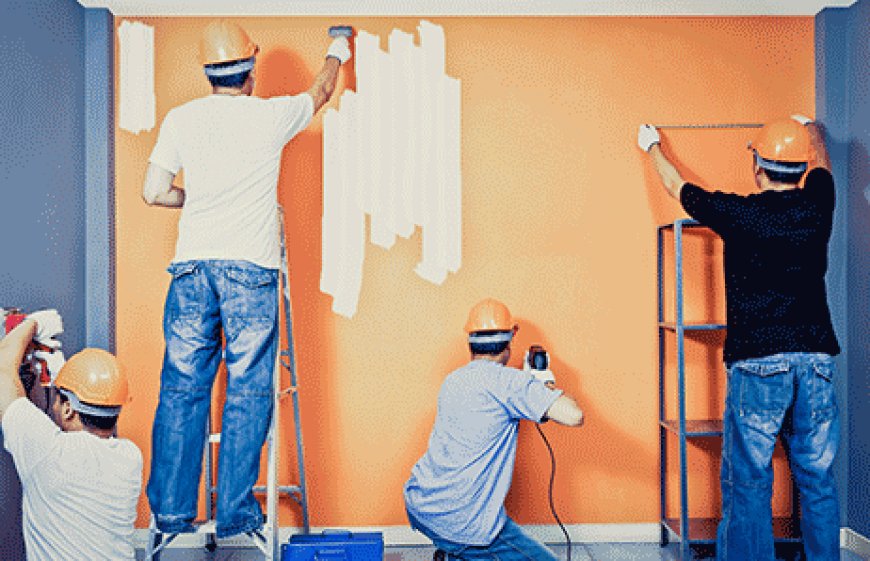
Applying paint with a smooth, polished look requires using the right brush and roller techniques. To remove surplus paint from a brush, tap it against the paint can's edge after loading it with paint. To avoid clear brush marks, use long, smooth strokes regularly apply pressure. To equally distribute paint when using rollers, begin by rolling the paint onto the wall in the form of a "W" or "M". After that, apply paint vertically to cover the entire surface, slightly overlapping each stroke to provide even coverage. To avoid the paint drying too quickly, be sure to work in small pieces. Take your time and apply these techniques to achieve a paint job that is faultless and something you will be pleased of.
Achieving a paint job that looks professional requires avoiding brush marks and streaks. Using high-quality brushes and rollers at first will help avoid streaks and marks from being left behind. To guarantee even covering, load your brush or roller evenly with paint and apply it in overlapping, smooth strokes. Paint streaks and markings can result from applying excessive paint or applying too much pressure. Prior to the paint fully drying, use a dry brush or roller to carefully feather out any streaks or brush marks that may have developed. To achieve a flawless finish, take your time and use the right techniques to avoid streaks and brush marks.
Applying the First Coat
A professional-looking finish depends on an even coat of paint. Prepare your surfaces correctly first, cleaning, repairing, and sanding as necessary. Make sure your rollers and brushes are perfectly loaded with paint and of the highest quality. Work in small parts to achieve even coverage as you apply the paint in smooth, overlapping strokes. It is best to take your time and not rush the process because this can result in streaks and uneven application. For a more even finish, add a second coat if needed after the first has fully dried. You may get a beautiful finish by applying paint in a smooth and uniform manner by using these techniques.

A successful painting project requires an understanding of drying conditions and timelines. The length of time paint takes to dry might vary depending on the paint type and the surrounding conditions. Latex paint dries faster than oil-based paint, typically within a few hours, but oil-based paint might take up to 24 hours or more. Temperature, humidity, and airflow can all affect drying periods. While drying can happen more quickly in warmer weather with lower humidity, it can also happen more slowly in cooler weather with more humidity. It's critical to leave enough time in between applications and to follow to the manufacturer's drying time guidelines. Additionally, avoid painting in harsh temperatures or high humidity, as these may damage the paint's ability to dry correctly.
Checking for Imperfections
To guarantee a paint job that looks professional, it is important to check for any missed areas or uneven coverage. Once the paint has completely dried, carefully go over the walls to look for any spots where the covering is uneven or where paint may have missed. Spot any weaknesses using a bright light, then add more paint as necessary to cover up these areas. Be especially mindful of the trim, corners, and edges because it's easy to miss these details. Take your time checking your work for a perfect finish by identifying any errors and making the necessary touch-ups. Make sure your paint job looks its best and lasts as long as possible by checking for missing spots or uneven coverage.
Applying the Final Coat
A successful painting project depends on maintaining consistency with the first layer of paint. To guarantee consistent color and texture, begin by thoroughly mixing the paint. Strokes should be smooth and overlapping to guarantee an even application of paint on the surface, avoiding streaks and unequal coverage. To ensure consistent application throughout, take your time and work in small parts. Be mindful of regions like corners and edges that can need more covering. You may establish a strong foundation for further applications and finally achieve a polished finish by being consistent with the first coat.
Cleaning Up
Proper disposal of painting supplies is critical for both the environment and safety. If empty paint cans and containers are totally dry, they can be recovered. If paint is still useful, think about giving it to a neighborhood group or saving it well for later use. Paint thinner, solvents, and other potentially dangerous materials need to be transported to a nearby hazardous waste disposal site. Wipe down brushes, rollers, and other equipment with water or the proper cleaning solution, and properly dispose of any leftover paint or cleaning supplies. You may safeguard your safety and the safety of others by disposing of painting supplies in an environmentally responsible manner.
Final Touches
The last stage of painting involves removing painter's tape, and it must be done carefully to protect the recently painted surfaces. Pull the tape back carefully and evenly after starting to take it off at a 45-degree angle. Avoid pulling too quickly since it can cause the paint to split or chip. Use a tool knife or razor blade to carefully score the tape's edge before peeling it off if you encounter any resistance or find that the tape is difficult to remove. To guarantee an orderly and seamless removal procedure, take your time and exercise caution. When you correctly remove painter's tape, your painting project will have clear, crisp lines and a finished look.
Making sure everything appears as well as it should and satisfies your requirements requires inspecting the finished project. Examine the painted surfaces thoroughly from a distance to look for any drips, faults, or missed areas. Highlight any areas that might require touch-ups with a bright light. Be especially aware of the trim, corners, and edges because these are commonly overlooked areas. Take note of any problems and fix them before declaring the project finished. You can be sure that your painting job looks great and lives up to your expectations by carefully evaluating the finished product.
What's Your Reaction?